
DIY Shower Set Installation: Step-by-Step Troubleshooting and When to Call a Professional
Want this done properly without the hassle?
Aap DIY try kar sakte hain, lekin agar time nahi ya confidence kam ho, to professional bula lena better hota hai. Galat step se damage ya safety issue ho sakta hai.
Quick answer (read this first)
- Turn off water supply, remove old unit, wrap threads with Teflon tape, install new parts without over-tightening, test for leaks, and call a pro if pressure drops or pipes leak.
Safety first
- Always shut off the main water supply before starting any work.
- Wear protective gloves and safety goggles to guard against sharp metal edges and sudden water spray.
- Never force or hammer fittings—this can rupture pipes or damage valves, especially in older Pakistani plumbing systems.
- Do not proceed if you see exposed electrical wiring, damaged conduits, or wet floors near the work area.
- Avoid working alone—have someone nearby in case of water bursts or slips.
Tools you may need
- Adjustable wrench
- Teflon tape (plumber’s tape)
- Pipe cutter or hacksaw
- Bucket and absorbent towels
- Plumber’s putty (for base seals if required)
- Measuring tape
Step-by-step
Step 1
Turn off the main water supply valve and open the nearest faucet to drain remaining water from the pipes.
Step 2
Remove the old shower set by loosening connections with an adjustable wrench—place a bucket beneath to catch drips and debris.
Step 3
Clean all pipe threads thoroughly and wrap Teflon tape clockwise around each threaded end using 3–4 full layers for a watertight seal.
Step 4
Screw the new shower arm and valve body onto the wall pipe by hand first, then tighten gently with the wrench—do not over-torque.
Step 5
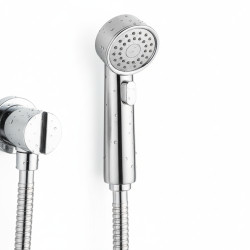
Attach the showerhead and hand-held hose, ensuring all connections are aligned and snug, but not forced beyond hand-tight plus a quarter turn.
Step 6
Slowly turn the water back on, check every joint for leaks, test water pressure and temperature stability, and wipe dry before sealing any wall openings.
Common mistakes
- Skipping Teflon tape, causing slow leaks that damage walls over time.
- Over-tightening fittings, which cracks brass threads or breaks plastic valves common in budget Pakistani fixtures.
- Ignoring pipe alignment, leading to stress fractures when water pressure changes.
- Using PVC or non-hot-water-rated pipes for hot water lines—this can melt or deform under Pakistani summer temperatures.
- Failing to test for leaks before tiling or closing walls, leading to hidden water damage and mold.
When to call a professional
- Water pressure is weak, fluctuating, or drops significantly after installation.
- You hear loud banging, whistling, or rattling sounds from pipes when water flows.
- Pipes appear corroded, bent, or are made of unknown material like galvanized iron or lead.
- Leaks continue even after reapplying Teflon tape and re-tightening connections.
- You need to cut into walls, ceilings, or floors to access hidden plumbing lines.
Want this done properly without the hassle?
Aap DIY try kar sakte hain, lekin agar time nahi ya confidence kam ho, to professional bula lena better hota hai. Galat step se damage ya safety issue ho sakta hai.




