
How to prevent common Shower Set Installation problems and when to call a pro
Want this done properly without the hassle?
Aap DIY try kar sakte hain, lekin agar time nahi ya confidence kam ho, to professional bula lena better hota hai. Galat step se damage ya safety issue ho sakta hai.
Quick answer (read this first)
- Always turn off the main water supply first.
- Apply thread seal tape correctly to all threaded connections.
- Verify hot and cold water lines are properly aligned.
- Thoroughly inspect for leaks immediately after installation.
Safety first
- Always shut off the main water supply to prevent flooding.
- Wear appropriate safety gear: gloves and eye protection.
- Handle tools carefully to prevent cuts or injuries.
- Never attempt electrical work for shower heaters unless you are a qualified electrician.
- Avoid over-tightening fittings to prevent damage and leaks.
Tools you may need
- Adjustable wrench or spanner
- Screwdriver set
- Thread seal tape (PTFE tape)
- Plumber’s putty or sealant (optional)
- Bucket or cloth for drips
- Measuring tape
Step-by-step
Step 1
Shut Off Water Supply: Locate the main water supply valve to your home or bathroom and turn it off completely. Open a nearby tap to drain any remaining water from the pipes.
Step 2
Remove Old Fixtures: If replacing an existing shower set, carefully unscrew and remove the old showerhead, arm, mixer, or faucet components. Use a wrench for any tight connections.
Step 3
Clean & Prepare Mounting Area: Thoroughly clean the exposed pipe threads and the wall surface where the new shower set will mount. Ensure it’s free of old sealant, dirt, or debris for a proper seal.
Step 4
Apply Thread Seal Tape: Wrap 3-5 layers of thread seal tape (PTFE tape) clockwise around the male threads of all connections. This is crucial for preventing leaks.
Step 5
Install the Mixer/Valve: Attach the new shower mixer or valve to the wall connections. Double-check that the hot and cold water lines are correctly aligned before tightening connections firmly but without over-tightening.
Step 6
Attach Shower Arm & Head: Apply thread seal tape to the shower arm threads and screw it into the wall outlet. Then, attach the shower head to the arm, first hand-tightening, then a quarter turn with a wrench.
Step 7
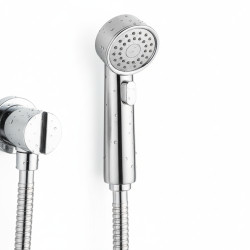
Connect Handheld Shower (Optional): If your set includes a handheld shower, connect the hose to the mixer outlet and the handheld sprayer to the hose. Ensure all rubber washers are properly seated.
Step 8
Test for Leaks & Functionality: Slowly reopen the main water supply valve. Carefully inspect all newly installed connections for any drips or leaks. If a leak occurs, gently tighten the specific connection. Test the shower’s hot and cold water flow and pressure.
Common mistakes
- Failing to shut off the main water supply, leading to flooding.
- Incorrectly applying thread seal tape (PTFE) or using too little, causing leaks.
- Over-tightening connections, which can strip threads, crack fittings, or damage pipes.
- Reversing hot and cold water lines, resulting in incorrect water temperature.
- Ignoring small drips or slow leaks, which can escalate into significant water damage.
- Using incompatible fittings or adapters, leading to improper seals and leaks.
When to call a professional
- If existing pipes are severely rusted, corroded, or cannot be disconnected easily.
- If leaks persist or worsen even after careful tightening and troubleshooting.
- If you experience a noticeable and persistent drop in water pressure after installation.
- If the project requires rerouting or major alterations to existing plumbing lines within the wall.
- If the existing plumbing setup is complex, embedded in walls, or requires specialized tools.
- If you feel uncertain or overwhelmed at any stage of the installation process.
Want this done properly without the hassle?
Aap DIY try kar sakte hain, lekin agar time nahi ya confidence kam ho, to professional bula lena better hota hai. Galat step se damage ya safety issue ho sakta hai.




