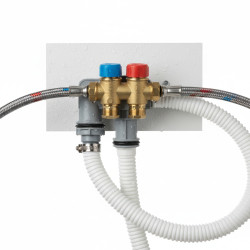
Preventing Common Water Meter Installation Problems

Want this done properly without the hassle?
Aap DIY try kar sakte hain, lekin agar time nahi ya confidence kam ho, to professional bula lena better hota hai. Galat step se damage ya safety issue ho sakta hai.
Quick answer (read this first)
- Always inspect the water meter for damage before installation.
- Ensure correct flow direction and securely tighten all connections.
- Choose an accessible, protected, and level installation site.
- Install shut-off valves (stopcocks) on both sides of the meter.
- Thoroughly test for leaks immediately after completing installation.
Safety first
- Always turn off the main water supply to your property before starting any work.
- Wear appropriate personal protective equipment, including safety gloves and eye protection.
- Exercise caution when using sharp tools like pipe cutters or hacksaws to prevent injury.
- Ensure adequate ventilation if working in enclosed or confined spaces.
- Never attempt to tamper with or modify the internal mechanisms of the water meter.
Tools you may need
- Adjustable pipe wrenches
- PTFE tape (Teflon tape)
- Hacksaw or dedicated pipe cutter
- Measuring tape
- Marker pen
- Clean rags or cloths
- Bucket (for draining residual water)
- Spirit level
Step-by-step
Step 1
Turn Off Main Water Supply: Locate and completely shut off the main water supply valve to your property to prevent water flow.
Step 2
Drain Existing Lines: Open a tap at the lowest point in your house to drain any residual water from the pipes, reducing spills during cutting.
Step 3
Select Installation Location: Choose an easily accessible, secure, and level location for the meter, ensuring it’s protected from potential damage and freezing.
Step 4
Inspect the New Water Meter: Carefully unbox and thoroughly inspect the water meter for any visible damage, cracks, or defects before beginning installation.
Step 5
Verify Flow Direction: Confirm the flow arrow on the water meter’s body points in the correct direction of water flow into your property.
Step 6
Measure and Mark Pipe: Accurately measure the length required for the water meter and any connecting fittings. Mark the exact cutting points on the existing pipe.
Step 7
Cut the Water Pipe: Use a pipe cutter or hacksaw to make clean, straight cuts at the marked locations on your main water supply line.
Step 8
Deburr Pipe Ends: Carefully deburr the inside and outside edges of the newly cut pipes to ensure smooth water flow and proper sealing.
Step 9
Install Shut-Off Valves: Install a durable shut-off valve (stopcock) immediately before and another immediately after the designated meter location. These allow for isolation during future maintenance without affecting your main supply.
Step 10
Apply PTFE Tape: Wrap PTFE (Teflon) tape clockwise around all male threaded connections (typically 3-5 wraps) to ensure a watertight seal.
Step 11
Position the Water Meter: Carefully fit the water meter into the prepared section of pipe, making absolutely sure the flow arrow points correctly towards your property.
Step 12
Hand-Tighten Connections: Begin by hand-tightening all connections to snug the meter into place and prevent cross-threading.
Step 13
Gently Tighten with Wrenches: Use pipe wrenches to gently but firmly tighten all connections. Avoid over-tightening, as this can strip threads or damage fittings.
Step 14
Slowly Restore Water Supply: Gradually turn the main water supply valve back on, allowing water to slowly re-enter the pipes and meter to minimize pressure shock.
Step 15
Thoroughly Inspect for Leaks: Carefully examine all new connections for any signs of drips, trickles, or leaks. Use a dry cloth to wipe connections for better visibility.
Step 16
Rectify Any Leaks: If any leaks are detected, immediately shut off the water, slightly tighten the problematic connection, or re-apply PTFE tape if necessary. Repeat the leak check.
Step 17
Secure the Meter Assembly: Once confirmed leak-free, ensure the water meter and its associated piping are firmly supported and secured to prevent movement or strain.
Step 18
Record Initial Meter Reading: Note down the initial reading displayed on the water meter. This is crucial for your records and for accurate water consumption tracking.
Common mistakes
- Installing the water meter with the flow arrow pointing in the wrong direction.
- Insufficient application of PTFE tape or improper sealing, leading to leaks.
- Over-tightening connections, which can strip threads or crack fittings.
- Choosing an inaccessible, unprotected, or non-level location for installation.
- Failing to install crucial shut-off valves (stopcocks) before and after the meter.
- Not thoroughly checking for leaks immediately after the installation is complete.
When to call a professional
- You encounter persistent leaks that you are unable to fix after attempting repairs.
- The existing piping system requires significant modification or rerouting beyond your expertise.
- You are unsure about selecting the correct pipe sizing, materials, or fittings for your system.
- The main water supply valve is faulty, cannot be located, or cannot be safely shut off.
- The water meter appears significantly damaged or faulty upon initial inspection, beyond minor issues.
- You lack the specialized tools, confidence, or experience required to complete the installation safely and correctly.
- Local plumbing codes or regulations in Pakistan mandate professional installation for billing water meters.
Want this done properly without the hassle?
Aap DIY try kar sakte hain, lekin agar time nahi ya confidence kam ho, to professional bula lena better hota hai. Galat step se damage ya safety issue ho sakta hai.