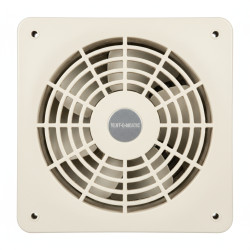
DIY Exhaust Fan Safety Checks & Troubleshooting
Want this done properly without the hassle?
Aap DIY try kar sakte hain, lekin agar time nahi ya confidence kam ho, to professional bula lena better hota hai. Galat step se damage ya safety issue ho sakta hai.
Quick answer (read this first)
- Always turn off power at the main breaker before starting any inspection or repair.
- Regularly clean fan blades, covers, and vents to ensure optimal airflow.
- Inspect for loose connections, frayed wires, or any visible obstructions.
- Ensure the fan unit is securely mounted to its position.
- Call a professional electrician for any complex electrical issues, persistent problems, or if you are uncomfortable with the task.
Safety first
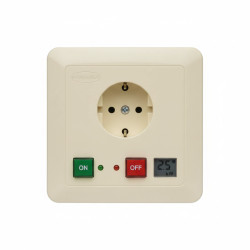
- ALWAYS turn off power at the main breaker before starting any work on the exhaust fan.
- Verify power is off using a non-contact voltage tester if available.
- Use only insulated tools to prevent electrical shocks.
- Do not work on wet surfaces or with wet hands.
- Never touch bare wires unless power is confirmed off.
- Wear appropriate personal protective equipment, including gloves and eye protection.
Tools you may need
- Screwdriver set (Phillips and flathead)
- Insulated pliers
- Cleaning cloth or brush
- Flashlight
- Ladder (if fan is installed high)
- Non-contact voltage tester (optional, but highly recommended)
Step-by-step
Step 1
Locate your home’s main electrical breaker box.
Step 2
Identify and switch off the circuit breaker dedicated to the exhaust fan.
Step 3
Confirm the fan is completely powered off by trying to switch it on.
Step 4
Visually inspect the fan for any visible damage or loose covers.
Step 5
Check for obstructions like accumulated dust, spiderwebs, or debris around the fan blades and motor housing.
Step 6
Carefully remove the exhaust fan cover.
Step 7
Gently clean fan blades and the interior of the housing with a damp cloth or soft brush.
Step 8
Ensure the external exhaust vent is clear of any blockages that could restrict airflow.
Step 9
Verify the fan unit is securely mounted to the wall or ceiling, tightening any loose screws if necessary (with power OFF).
Step 10
With power OFF, gently check for any visibly loose or frayed wires at the fan’s connection point.
Step 11
Restore power to the fan at the main breaker box.
Step 12
Turn on the exhaust fan and listen for unusual noises such as grinding, buzzing, or excessive rattling.
Step 13
Hold a light tissue paper near the fan to check for effective airflow (the fan should pull the paper towards it).
Step 14
Note if the fan struggles to pull air even after cleaning, as this may signal a motor problem.
Common mistakes
- Forgetting to turn off the main power supply before beginning any work on the fan.
- Ignoring strange noises, burning smells, or sparks coming from the exhaust fan.
- Attempting to force stuck fan blades instead of cleaning them gently.
- Neglecting regular cleaning, which leads to reduced efficiency and potential overheating.
- Using incorrect or non-insulated tools for electrical checks and repairs.
When to call a professional
- If the fan does not turn on at all, even after confirming power is restored and basic checks are done.
- If you observe burning smells, visible smoke, sparks, or melted components from the fan or its wiring.
- If the fan produces loud grinding noises, vibrates excessively, or repeatedly trips the circuit breaker.
- If you discover extensive damage to the fan’s internal wiring or motor components.
- If you feel uncomfortable or unsure about performing any of the inspection or minor repair steps.
- For any new exhaust fan installation or major electrical wiring modifications, always consult a qualified electrician.
Want this done properly without the hassle?
Aap DIY try kar sakte hain, lekin agar time nahi ya confidence kam ho, to professional bula lena better hota hai. Galat step se damage ya safety issue ho sakta hai.